How to Create a Device Template?
- Log into console.mydevices.com
- Create a Device Template (add screenshot): Go to the Device Templates Tab. Here, you can access all templates you've created for your applications and organization. You'll also find example templates that can serve as starting points. To begin, click on "Add Device Template" in the top-right corner.
General Tab
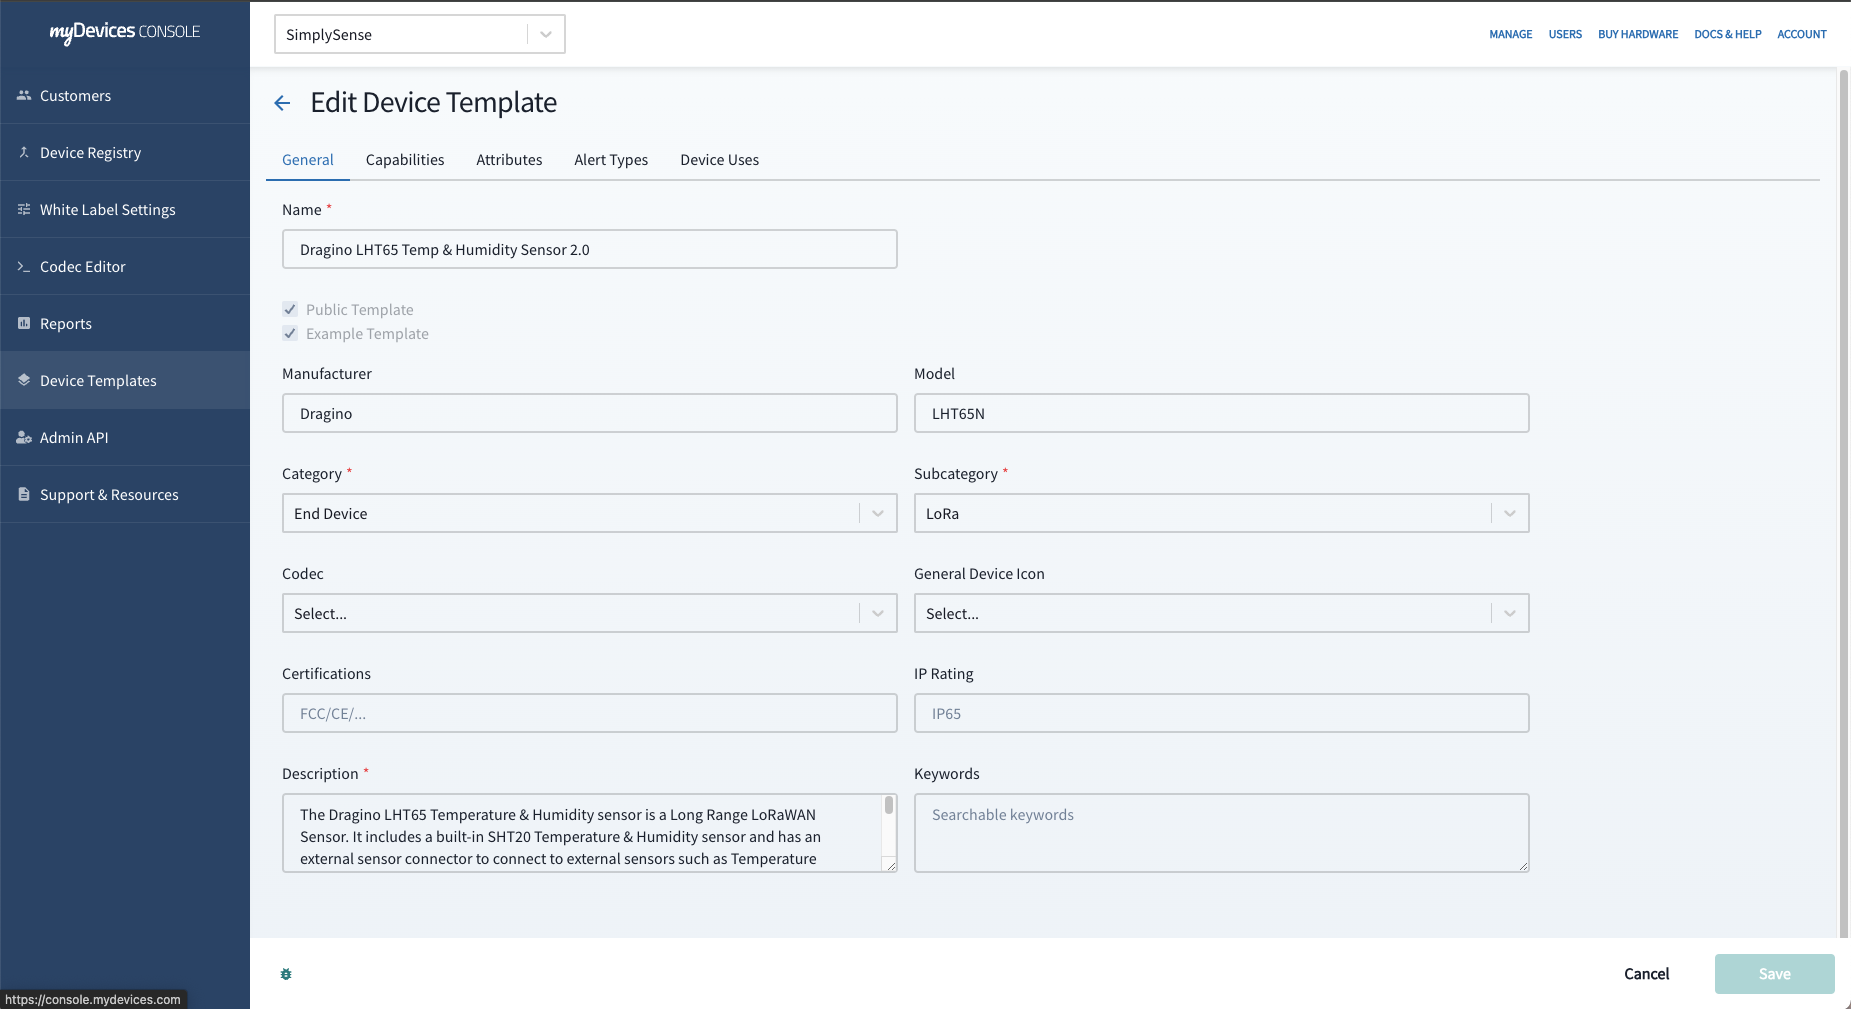
- Fill out all the fields such as Manufacturer, model, category, sub-category, codec, general device Icon, any certifications, IP rating, description and keywords. This information will be visible to end-users when they access device details or view the device on sensor maps.
See Codecs for more information on how to create a codec.
- When adding a device template, you will define the device category and subcategory.
- If you're adding a Gateway, select "Gateway" as the Category, and do not choose a codec. Currently, we support LoRa Gateways for the subcategory.
- For End Devices like sensors or actuators, a codec is required, and you should choose either LoRa or MQTT as the subcategory.
- For End Devices like BLE tags or beacons, a codec is not necessary, and you should use the subcategory "BLE."
Defining the Capabilities
Data capabilities represent the data transmitted by the device and are decoded by the codec. These capabilities determine how data appears in the management screen, gets stored in history, and enables alert creation. Click "Add Capability" to begin defining capabilities.
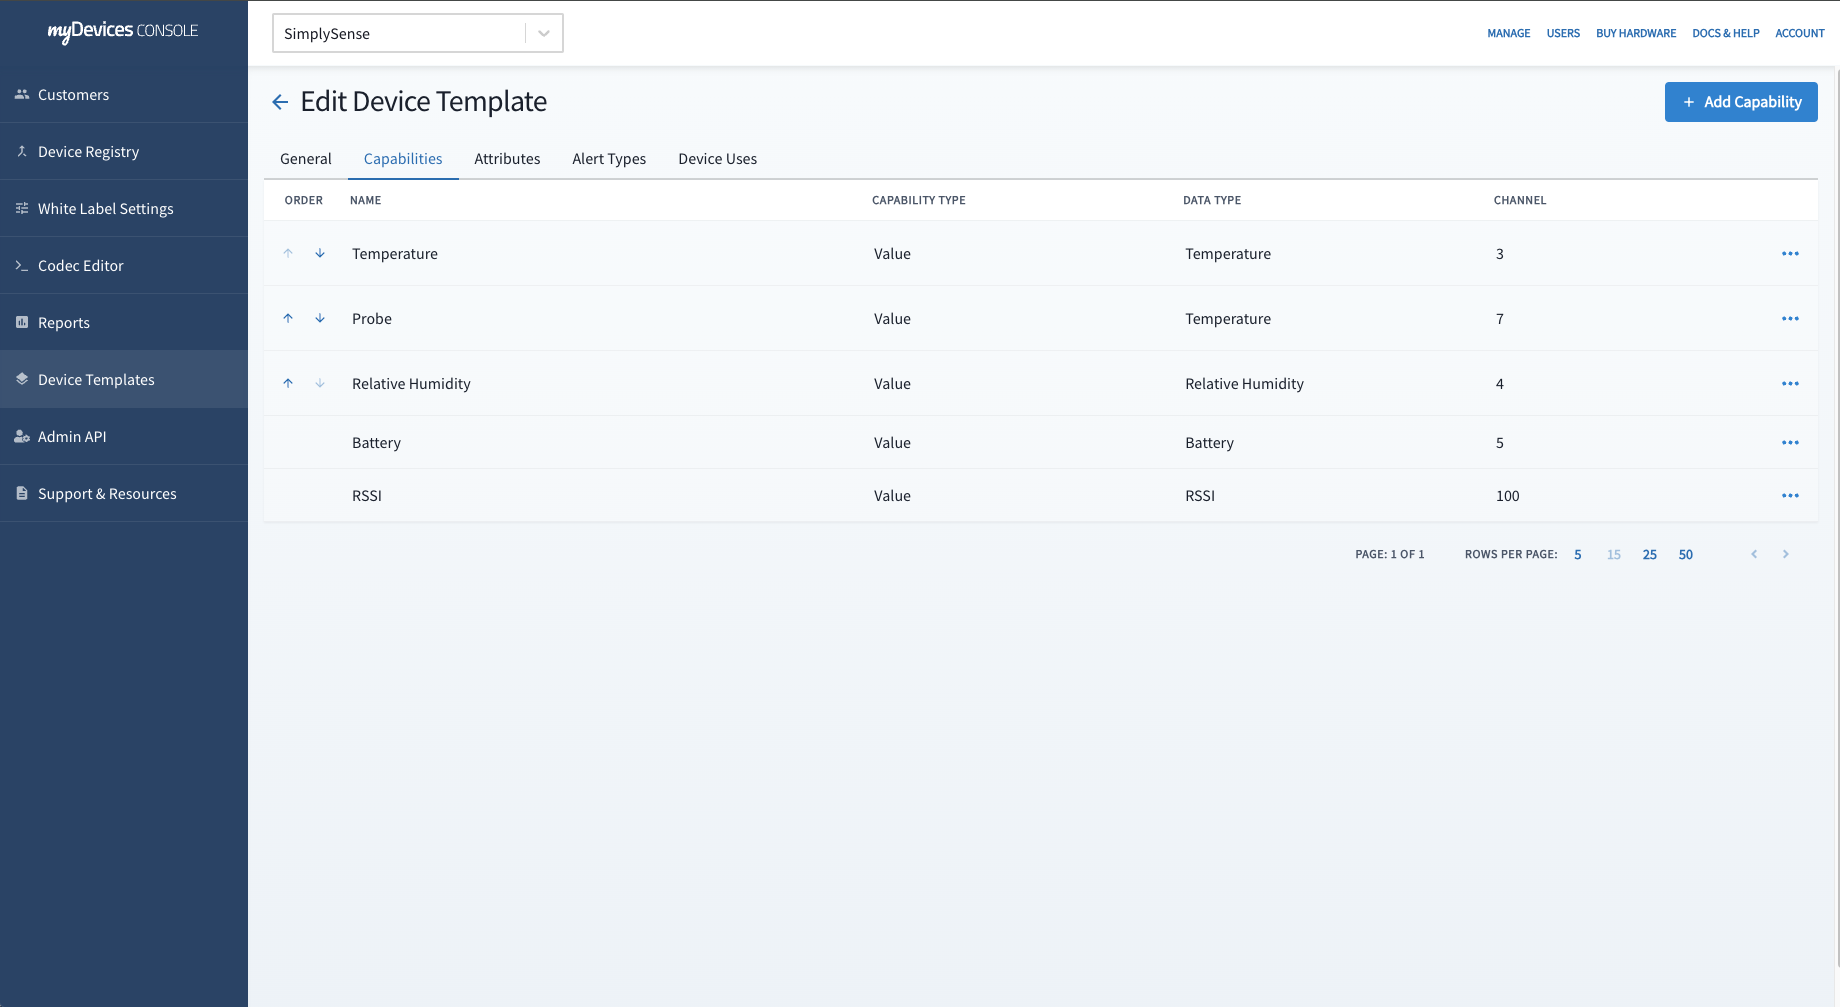
Fill out all fields including Template Type, Data Type, Name (Data Label in app), Channel ID, Chart, Icon and Widget.
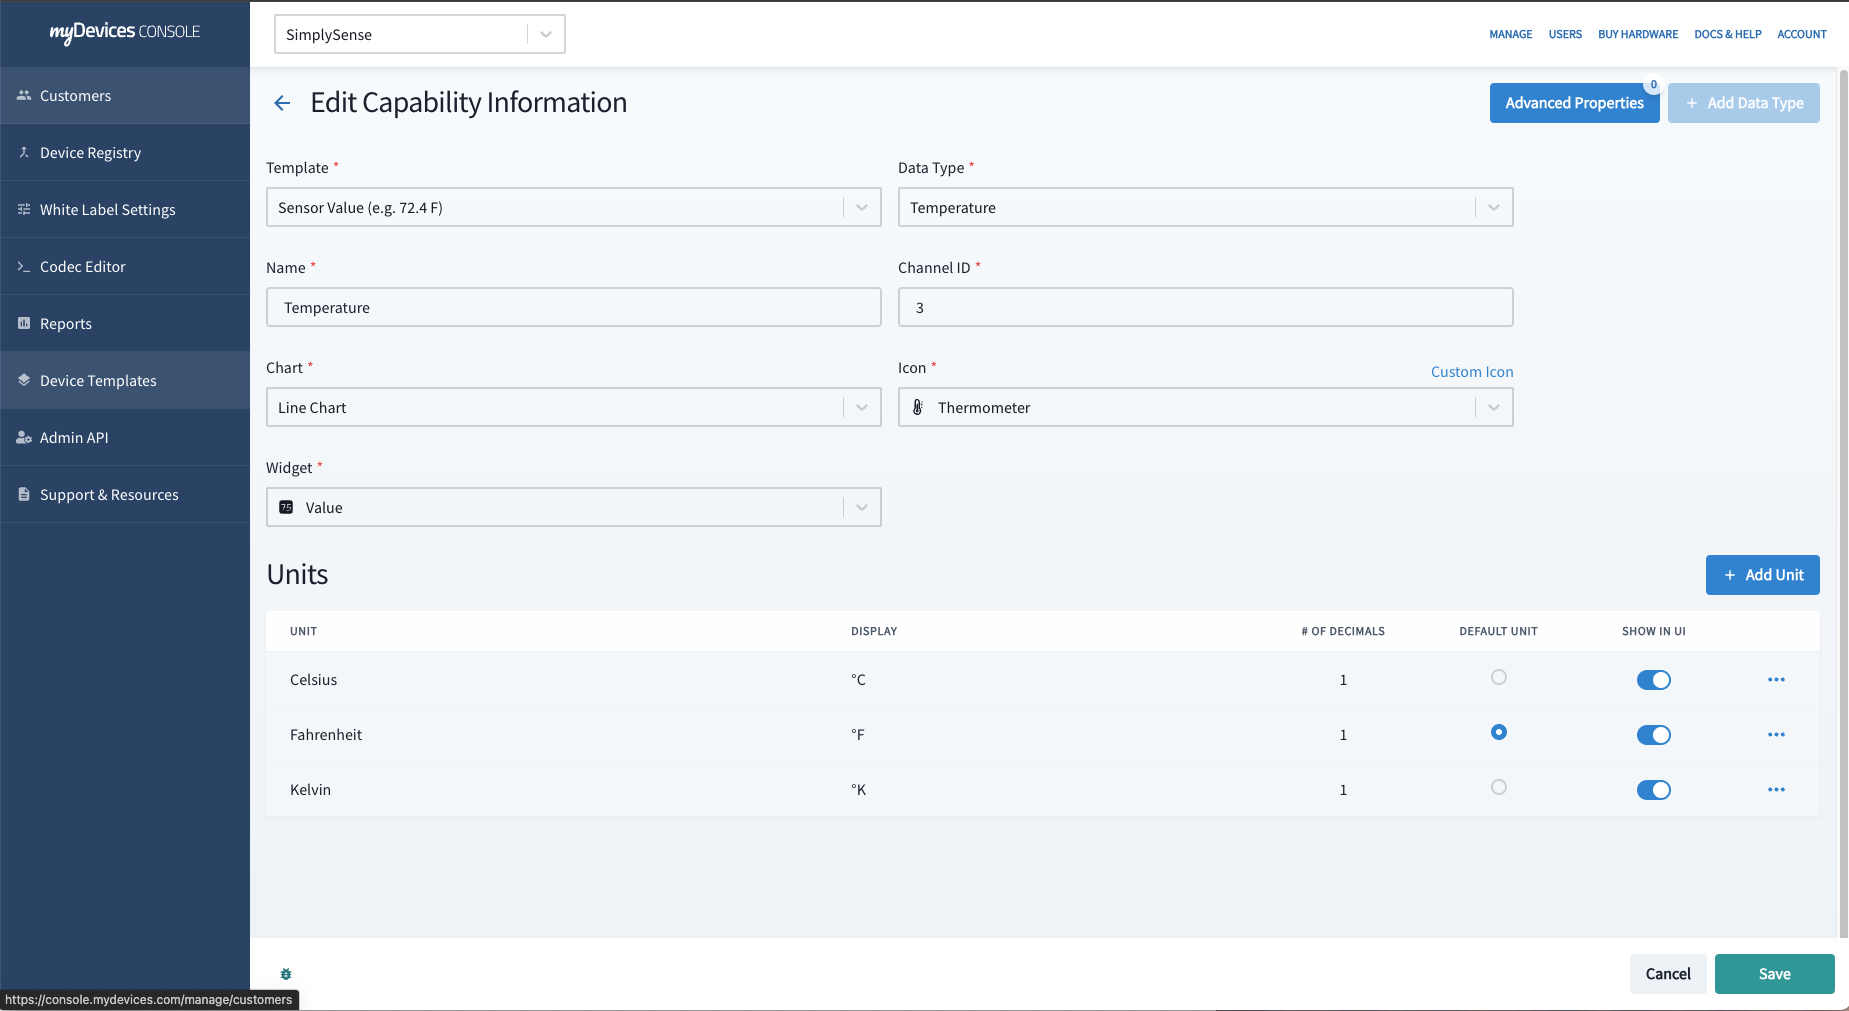
- Template Type supports different data representations, such as (e.g. 72.4 F), status (Open/Close), Tracking (GPS, BLE), Commands: Button (e.g. Stop Alert), Commands: Toggle On/Off (e.g. Water Valve), Commands: List (e.g. IR Blaster), and Image.
- Data Type corresponds to the type of data capability you're adding, e.g., temperature.
- Name is the label that appears in the user interface.
- Channel ID must match between the device template and codec.
- Chart defines the chart displayed in device details (e.g., line chart for value devices, status chart for status-based devices).
- Icon represents the icon for this data capability in sensor maps.
- Widget specifies the default widget added when this capability is included in a custom dashboard.
- Depending on whether you choose a value or status data type, you'll have options for Units or Status Labels.
Attributes
Attributes are used to set UI conditions for specific use cases (e.g., displaying device location on a map for tracking devices, adding resources or help links for the device, setting firmware configuration setting options for device, and providing sample payloads for sensor simulators).
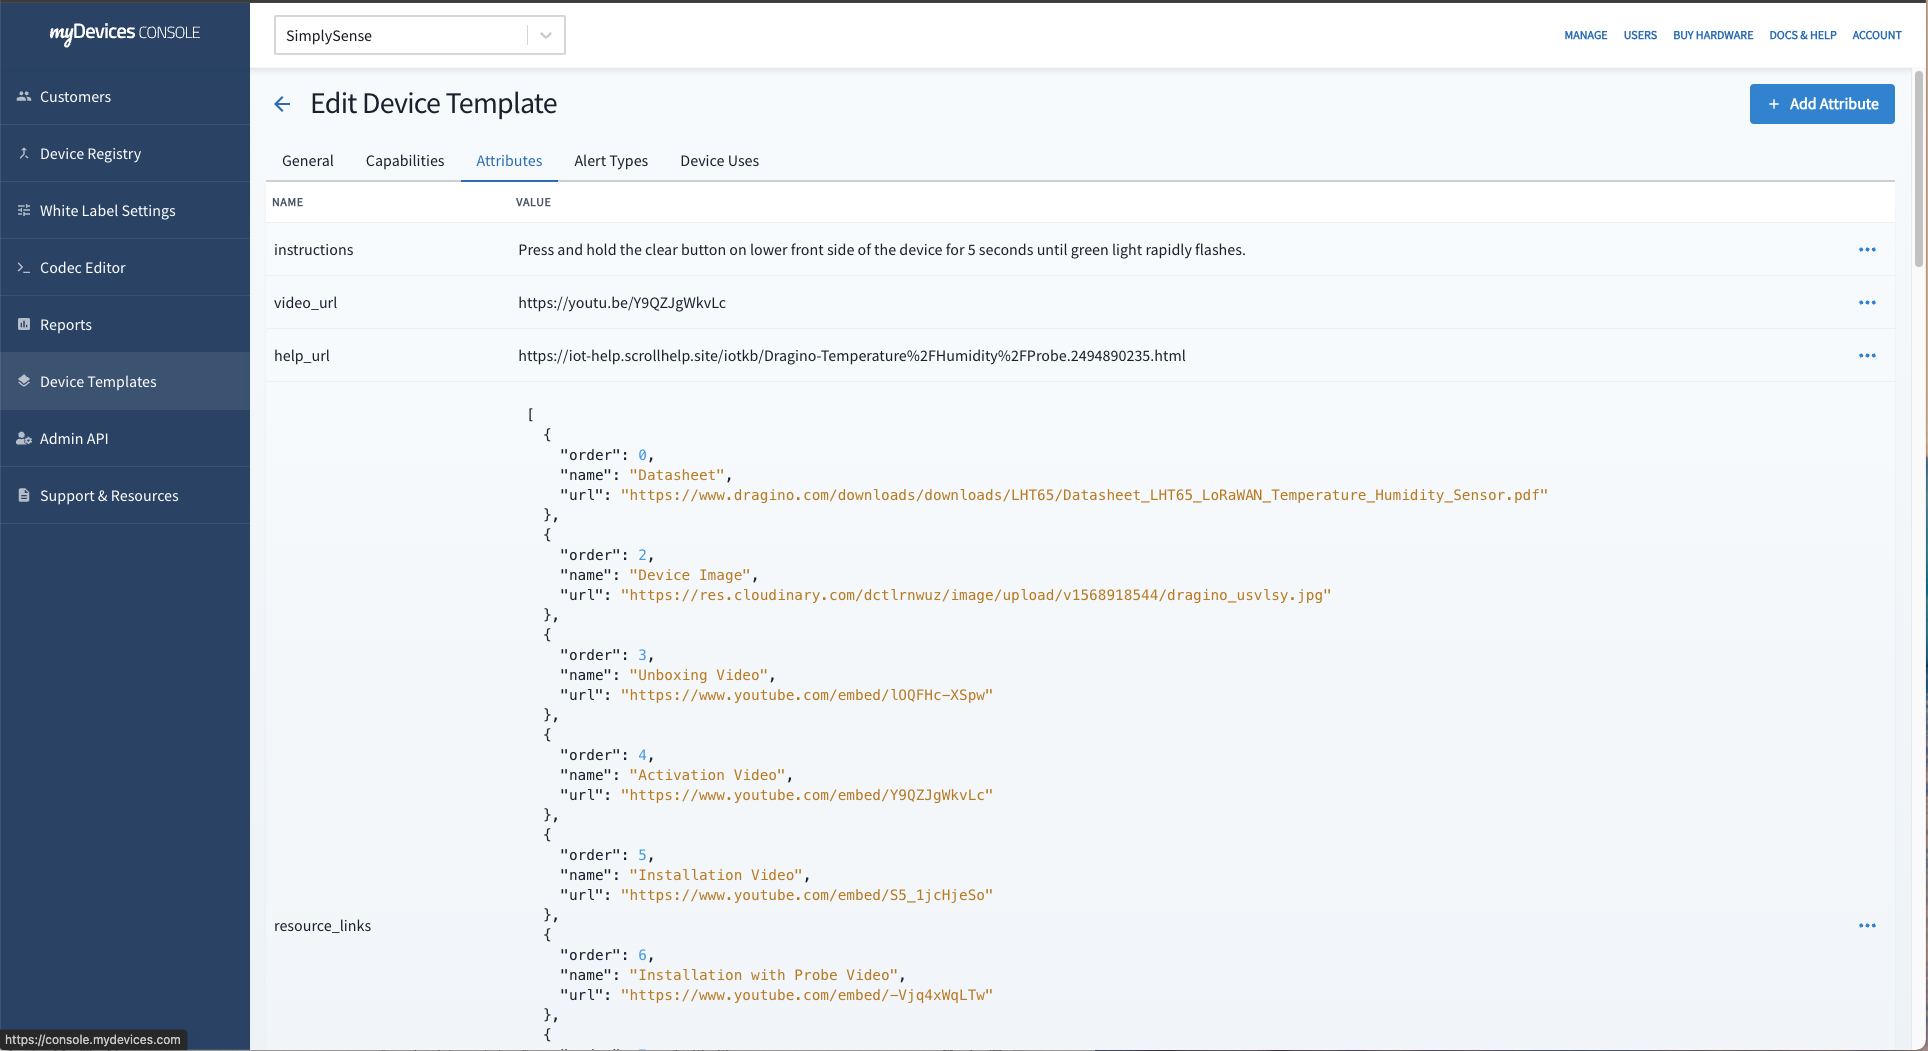
Not all attributes are required, with only the Broadcast interval and Device Type being mandatory.
Broadcast interval should be set to match how often the device periodically checks in. If a device checks in only once a day, its broadcast interval should be set to 1440. By default we would recommend at least 60 minutes and no greater then 1440 minutes.
Device Type appears next to the device name in the UI.

Alert Types
Whenever you add a capability using either a Value or Status template type, the corresponding alert is generated. The alert notification text is editable, but the alert template is not editable currently.
- For capabilities using Value template type, a Min/Max Threshold alert will automatically be created for that particular capability.
- For capabilities using Status template type, distinct alert types are generated for each unique status. For instance, if you have a Status-based Door sensor that transmits 0 for "closed" and 1 for "open," an alert type is created for both "Open" and "Closed" states.
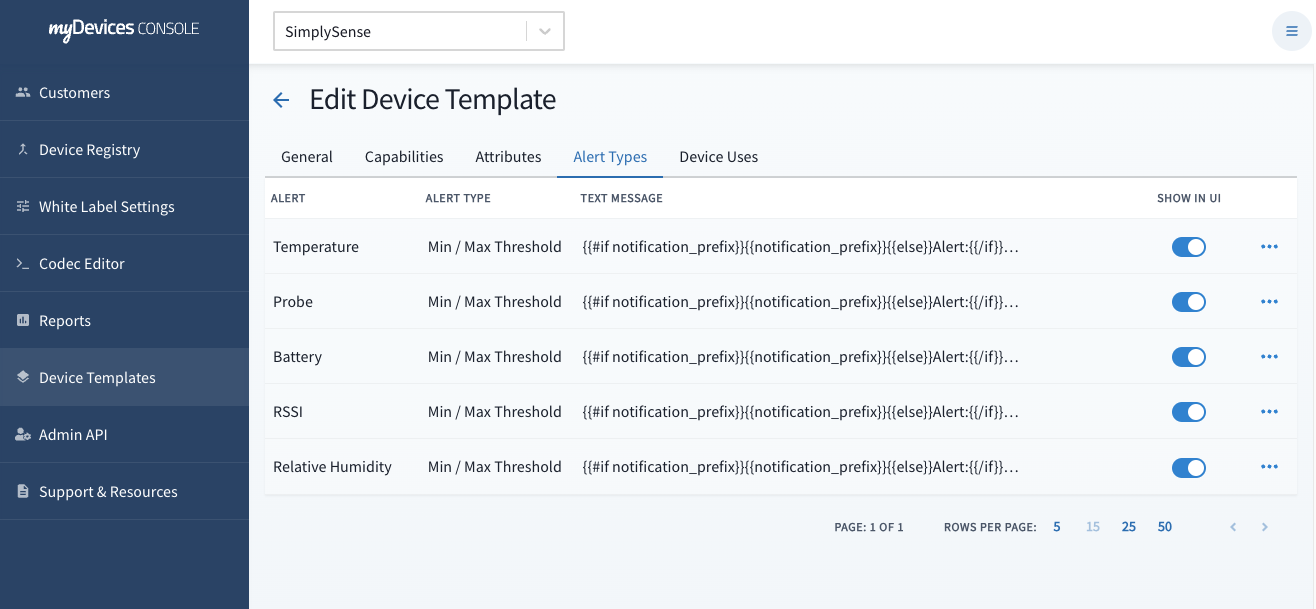
- Personalizing Alert Notification Text: You have the ability to modify the text of alert notifications that will be transmitted for a specific alert type.
- Enabling/Disabling Alert Type Settings: In certain scenarios, there may be data points where the end-user does not require an alert. In such cases, you can deactivate the display of the alert type (e.g., the "Panic Button Press" alert is visible in the user interface, while the "Not Pressed" alert can be toggled to a hidden status and will not be displayed).
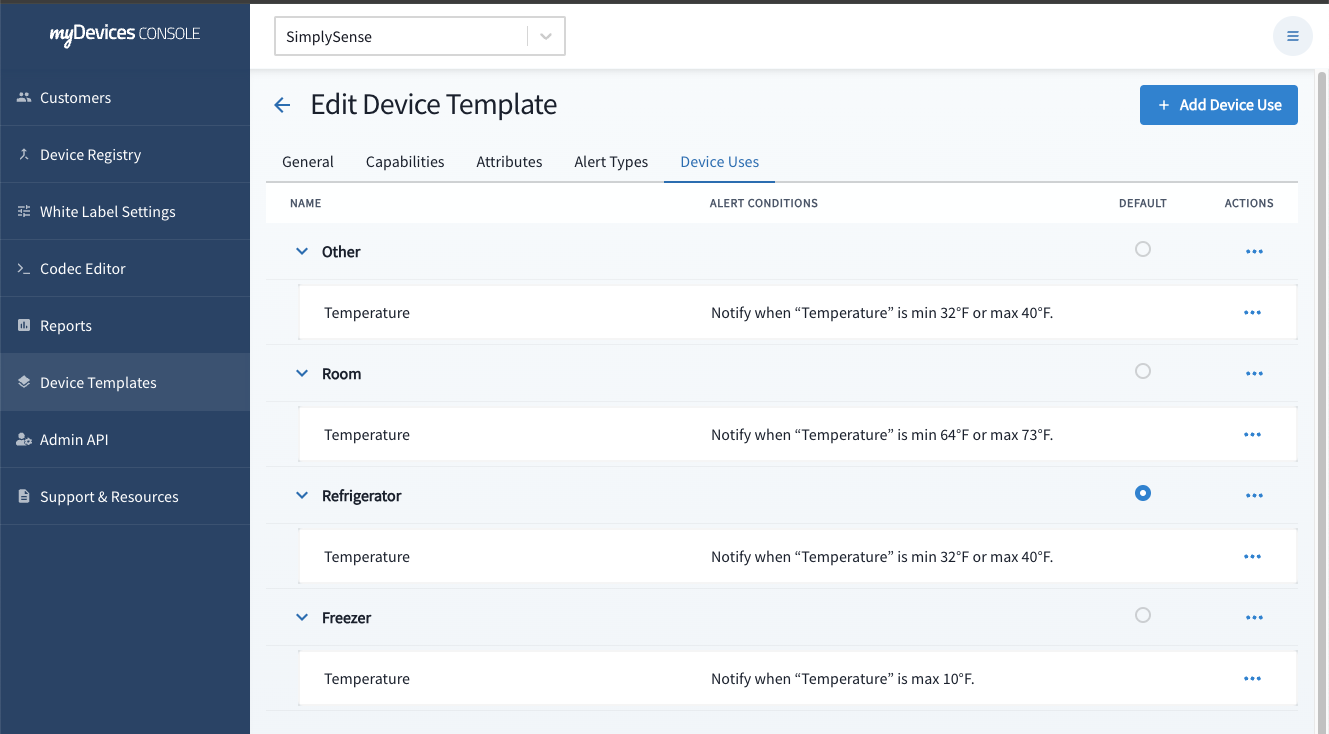
Device Uses
This feature allows you to include predefined alerts during the device setup process. This is particularly valuable when you already have specific alert requirements in mind for a given use case.
Registry
After creating a Device Template & Codec, you’ll next want to register device ID(s) to the new Device Template. Go to Registry Tab, click Upload Devices to begin.

- Template Catalog
- If you’re adding device IDs to a public template, choose Public.
- If you’re adding device IDs to a template you created, choose Application.
- Device Template
- Select the appropriate template
- Registry Type
- You can choose to register the IDs to a specific application or make it globally available
- Upload with Text input or CSV File
Provisioning
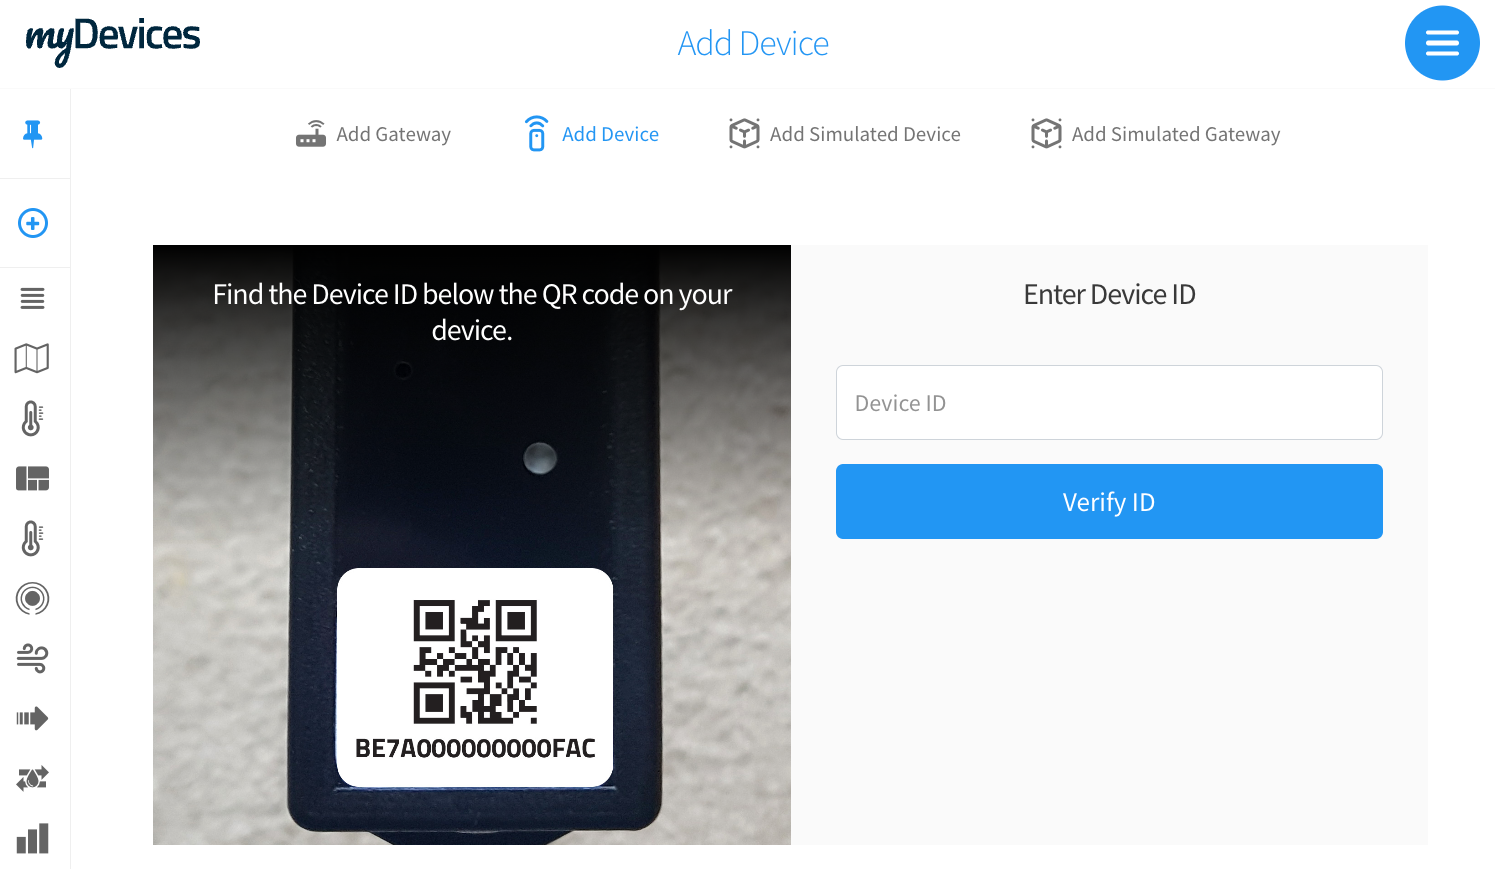
At this time, the device is ready to be registered in our application. Add the device to your app and visualize the data.