Actility
About Actility
Actility is an industry leader in Machine to Machine (M2M) large scale infrastructure with ThingPark®, the new generation standard-based M2M communication platform. Actility is a winner of the French Ministry of Research competition, has obtained the Grand Prix of the Tremplin Entreprise and has been rewarded by Innov’ Eco and CleanTech République for its particularly innovative approach in its Internet Of Things (IoT) solutions.
Using Actility with myDevices
myDevices makes it easy to use your LoRa device and the Actility network. You willeed to:
- Create / Log into your account on Actility's ThingPark portal
- Setup gateway device
- Create a Routing Profile
- Create a Connection Profile
We will walk you through these steps in the following sections.
Create account
To create your ThingPark account, visit the Actility ThingPark Partner's Portal and click on Try or the button Create free account to begin the process of creating your account.
Once your account has been created, you can log into your account from the Partner portal.
After logging into your account you will see the ThingPark Partner dashboard page. You will primarily use the Device Manager screen for the remainder of the documentation when configuring your account and devices to communicate with myDevices. To access this screen, open the side menu and select the Device Manager link.
After selecting the Device Manager link, your Device Manager screen will open.
Setup gateway device
In order for your LoRa devices to connect to the Actility network, you must have purchased and configured a gateway device. When using the Actility network, we recommend that you purchase and configure one of the following gateway devices:
- For use in the European Union, we recommend the Multitech Conduit EU868
- You can purchase a Multitech Conduit EU868 here.
- For use in the United States of America, we recommend the Multitech Conduit US915
- You can purchase a Multitech Conduit US915 here.
Be sure that you have an appropriate Actility gateway configured and working before continuing. Your devices will not be able to properly function without your gateway device in place.
Create myDevices Routing Profile
Legacy Enterprise Portal
In order for data from your device to reach myDevices, you must create an Application Server that points to myDevices in the Actility portal. You will also need to add an AS Routing Profile that uses this server. You only need to perform this step once. Any devices that you wish to add to myDevices will they need to be configured to use the routing profile or myDevices will not receive their data.
Begin by creating the Application Server. From the device manager, select the Application Servers entry and from the screen that appears, click on the Create button to begin creating a new server.
Give the new entry an appropriate name that you can refer to later, such as "myDevices". After proceeding, you will see the Application Server screen where you can enter in information for the application server. From this screen, click on the Add button located in the Add a route section.
In the Route section that gets added to the screen, click on the Add button to start adding a destination.
In the Add Destination dialog that appears, enter in the myDevices Actility URL and then click on the Add button to save your changes.
https://hub.m2c.io/v1/networks/iotinabox.actility/uplink
Finally, under header add a new header key: x-subscription-key and enter your subscription key under value.
Request a subscription key by submitting a support ticket.
Now that the Application Server has been setup, we need to create the AS Routing Profile. To create this profile select the AS routing profiles entry on the portal. From the screen that appears, click on the Create button to begin creating a new profile.
Give your profile an appropriate name, such as "myDevices" so that you can refer to it later when you configure your devices. After giving your profile a name, you will see the AS Routing Profile screen. Click on the Add button located in the Destinations section.
From the Add Destinations dialog that appears, be sure that the Type dropdown is set to Application Server. In the Destinations dropdown, be sure to select the Application Server you created earlier for myDevices.
After saving your changes, you will be returned to the previous screen. Be sure to click on the Save button to save the changes to your profile. You may now continue with creating a device that uses this profile.
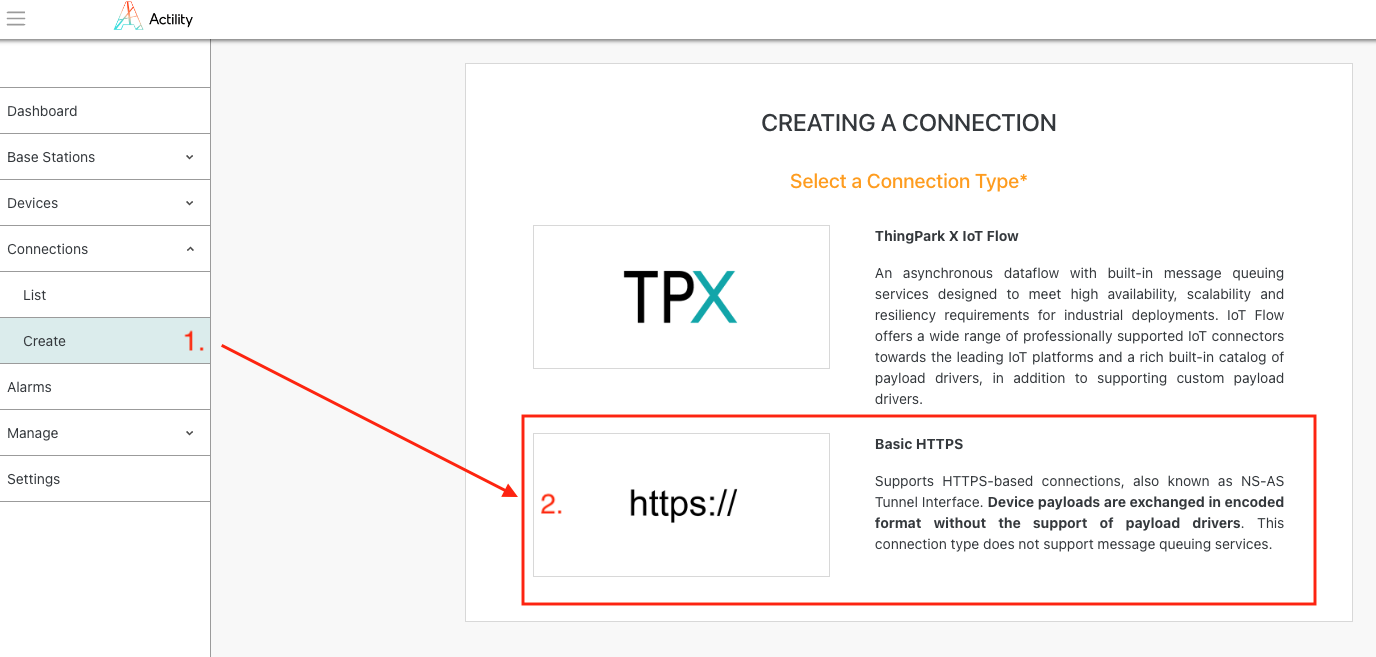
Create myDevices Connection Profile
Community Portal
- Begin by clicking on Connections dropdown and proceed to Create. In the connection selection page, pick
https://as the Connection Type to continue.
In the Basic HTTPS Connection form, give the new entry an appropriate Name that you can refer to later, such as "myDevices".
In the URL field, enter in the myDevices Actility URL.
https://hub.m2c.io/v1/networks/iotinabox.actility/uplink
- In the Custom HTTP Headers section, click on the Plus button to add a new header. The header dialog that appears, enter
x-subscription-keyas the Name and your subscription key under Value
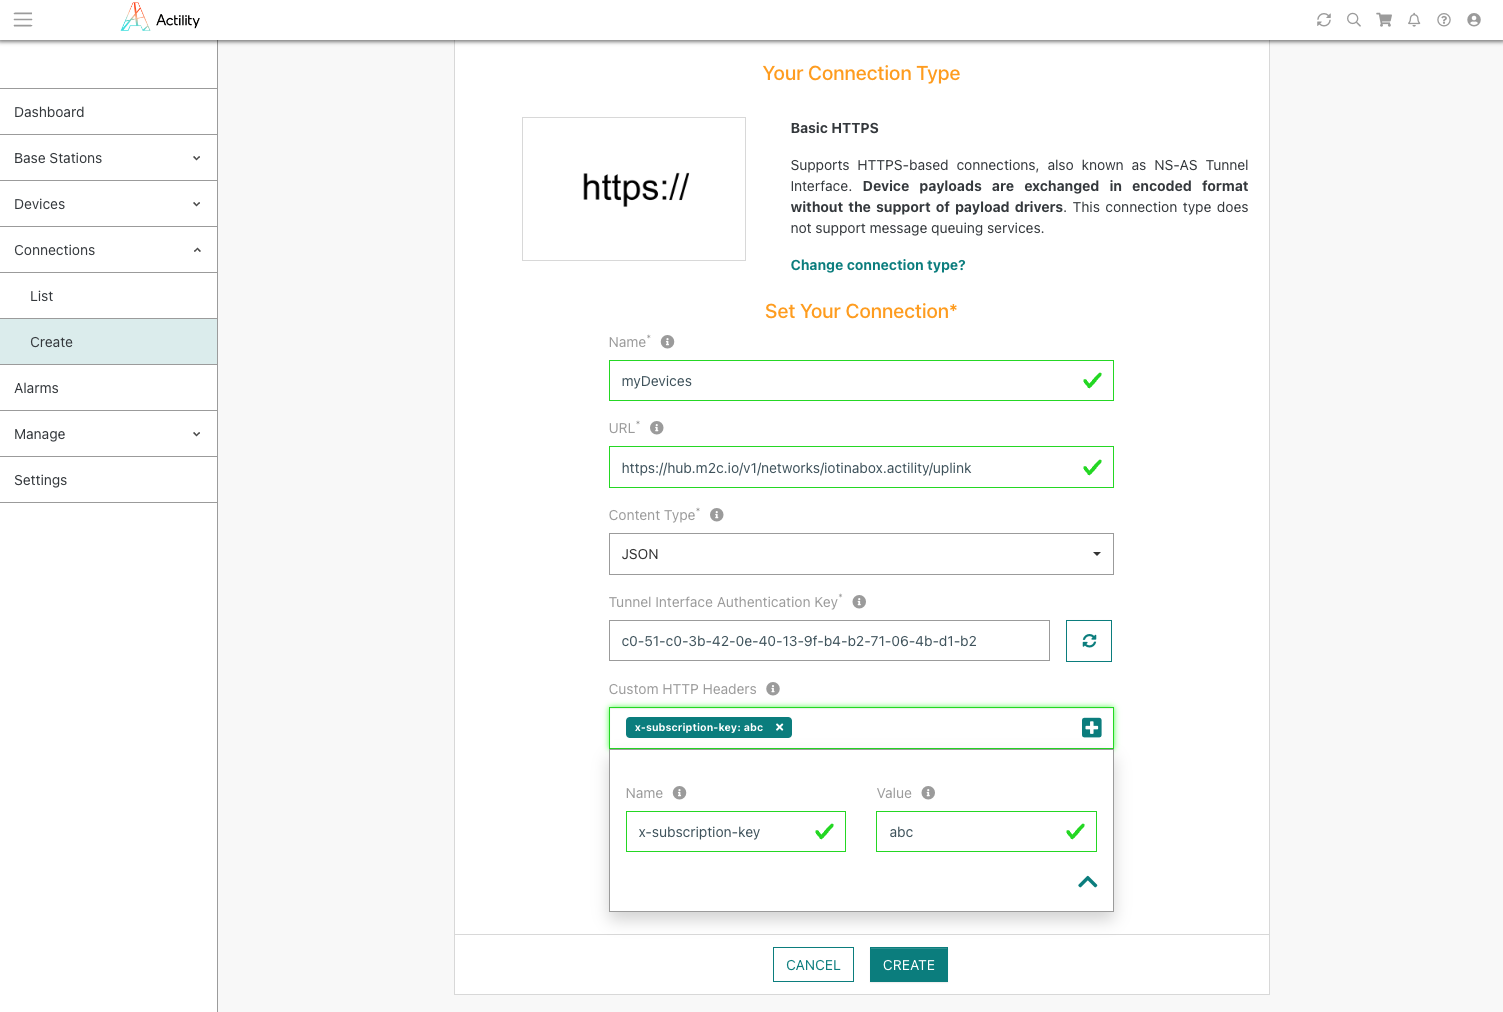
- Be sure to click on the Create to save your changes.