Everynet
About Everynet
Everynet offers infrastructure partners a disruptive and unrivalled business model to deploy large-scale, commercial LoRaWAN networks with lowest-cost, lowest-risk, quickest time-to-revenue and carrier grade quality. Everynet networks enable the digital transformation of business processes, generating real-time data from low cost sensors deployed in the field, and feeding in to big data cloud analytics systems. With this valuable data, businesses can generate new revenue streams, reduce costs and ensure compliance.
Using Everynet with myDevices
myDevices makes it easy to use your LoRa device and the Everynet network. You will need to:
- Create / Log into your account on Everynet's portal
- Setup gateway device
- Create a Filter
- Create an HTTP Connection
- Program/Flash your device
- Add your device to your Everynet
We will walk you through these steps in the following sections.
Login to your Everynet account
After logging into your account you will see the Everynet dashboard page. You will primarily use the Devices, Filters, and Connections screens for the remainder of the documentation when configuring your account and devices to communicate with myDevices. To access these screens, locate the tabs on the upper right corner of your screen.
Setup gateway device
In order for your LoRa devices to connect to the Everynet network, you must have purchased and configured a gateway device.
Be sure that you have an appropriate Everynet gateway configured and working before continuing. Your devices will not be able to properly function without your gateway device in place.
Create a Filter
In order for data from your device to reach myDevices, you must create an Filter ID.
Begin by selecting the Filters tab and creating a new Filter.

- Description: Enter the description for your filter. Give it an appropriate name that you can refer to later, such as "Send HTTP Push to myDevices"
- Device tags: Enter the Device tags for your filter. This ID should come with the information included with your device, or can be found in the device configuration.
 Note: Once you save your filter, make note of the Filter ID and keep it handy, as this will be a required parameter when creating a new connection.
After saving your changes, you should see the newly created filter on the left Filter ID list
Create an HTTP Connection
Under the Connections tab, create a new connection. Select the HTTP connection option, and fill the required parameters.
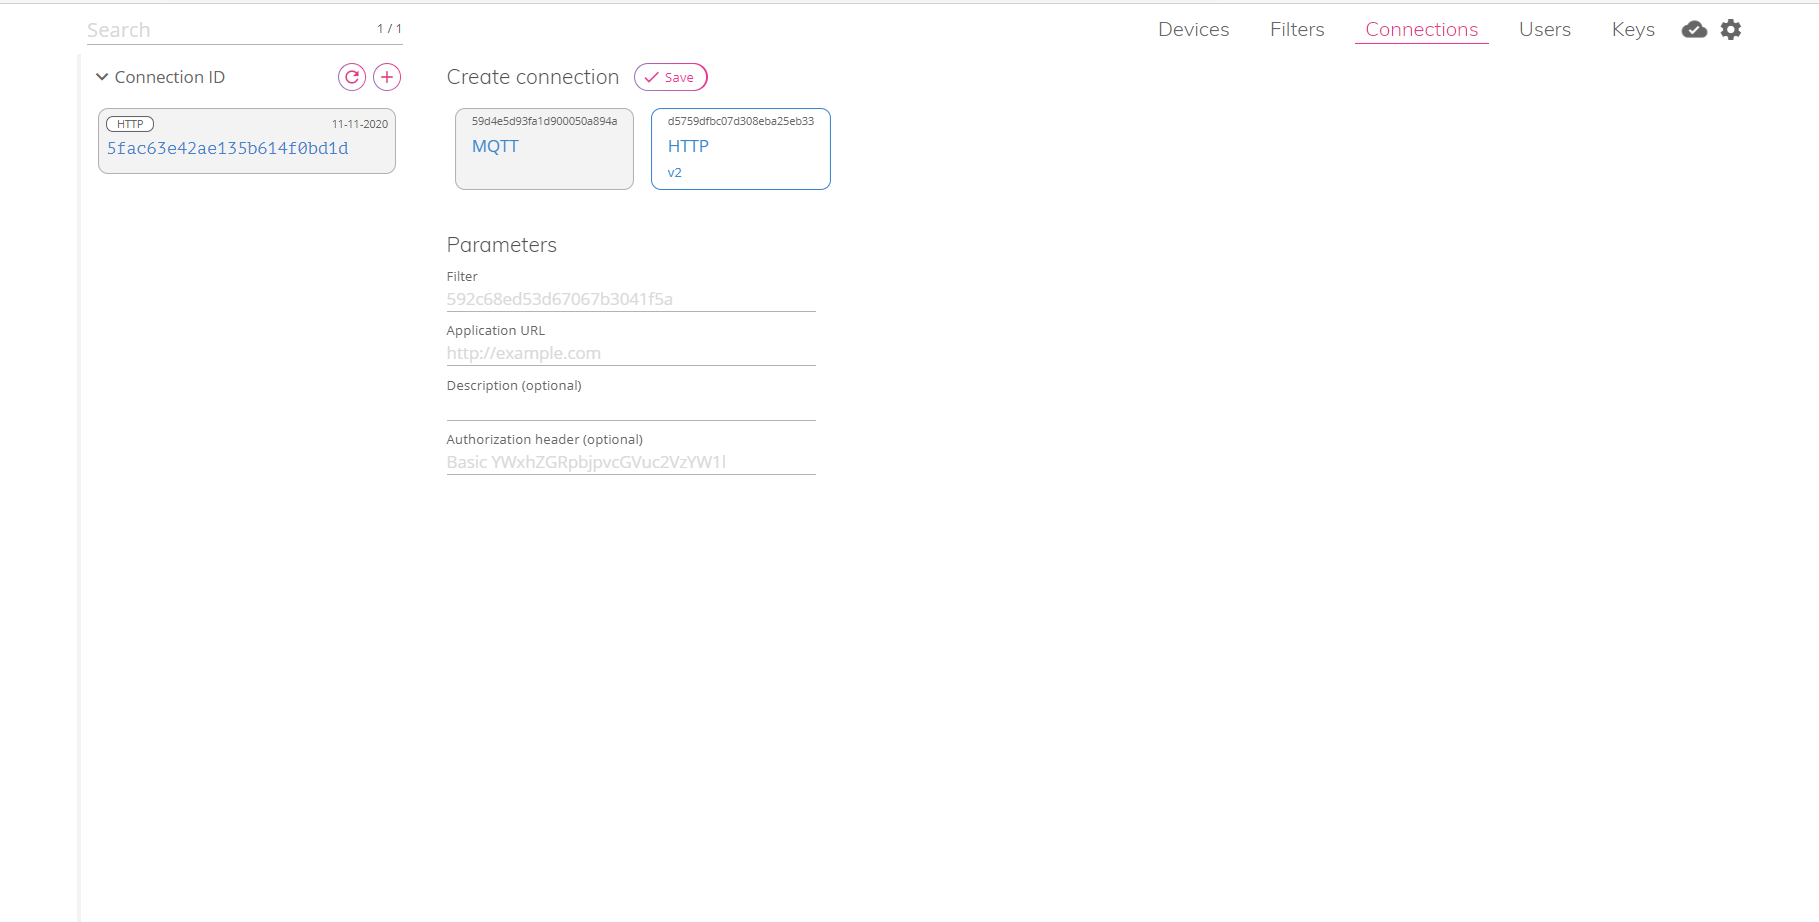
- Filter: Enter your filter ID from the filter that was previously created.
- Application URL: Enter the Application URL.
Programming the device
Some devices will come from your device supplier preprogrammed and ready to be used immediately. Other devices will require you to program the device manually. If your device is preprogrammed, it can now be deployed and connected to the network for usage.
If your device needs to be programmed, you shouldow proceed with programming/flashing the device. Because this process is different for each device, you should refer to the instructions for your device for any specific information youeed to perform this step. If youeed help, you can refer to the Supported devices section where you will find Product page, Datasheet and User Guides for your device.
NOTE: Be sure that your device is programmed and properly connected to the network at this time. Only after your device is programmed, online and properly forwarding data should you proceed with adding your device to myDevice.
Add device to Everynet
Once your device has been registered, programmed, configured to forward data to Cayenne and is online, you can proceed with adding the device in Cayenne so that it appears in your dashboard.
From the Everynet Dashboard, click Devices and create a new device.
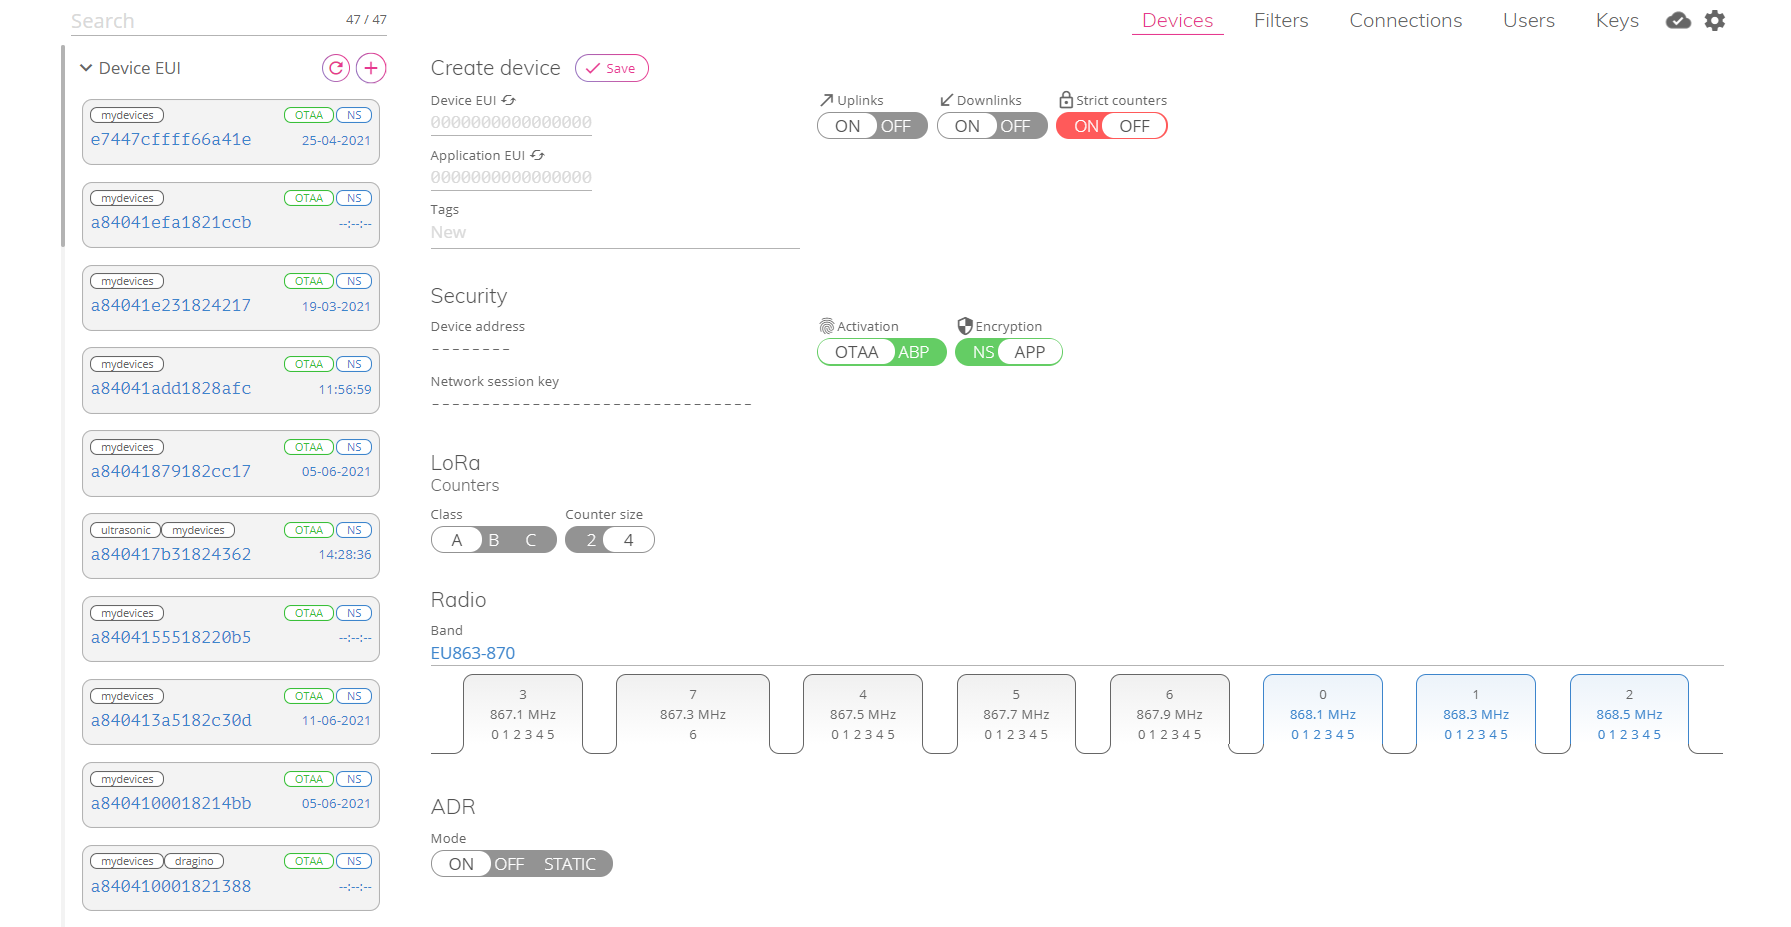
- Device EUI: Enter your Device EUI from the device you wish to pair.
- Application EUI: Enter the Application EUI.
- Tags: Enter the tags specifically as created in the Filter.
- NOTE: This is required to receive data from the device!
After adding the device, your set-up is complete. Whenever your device sends data, it will be relayed to the myDevices application.