The Things Network
Using The Things Industries with myDevices
Requirements
- A Things Industries account
- Access to the myDevices Console
Steps
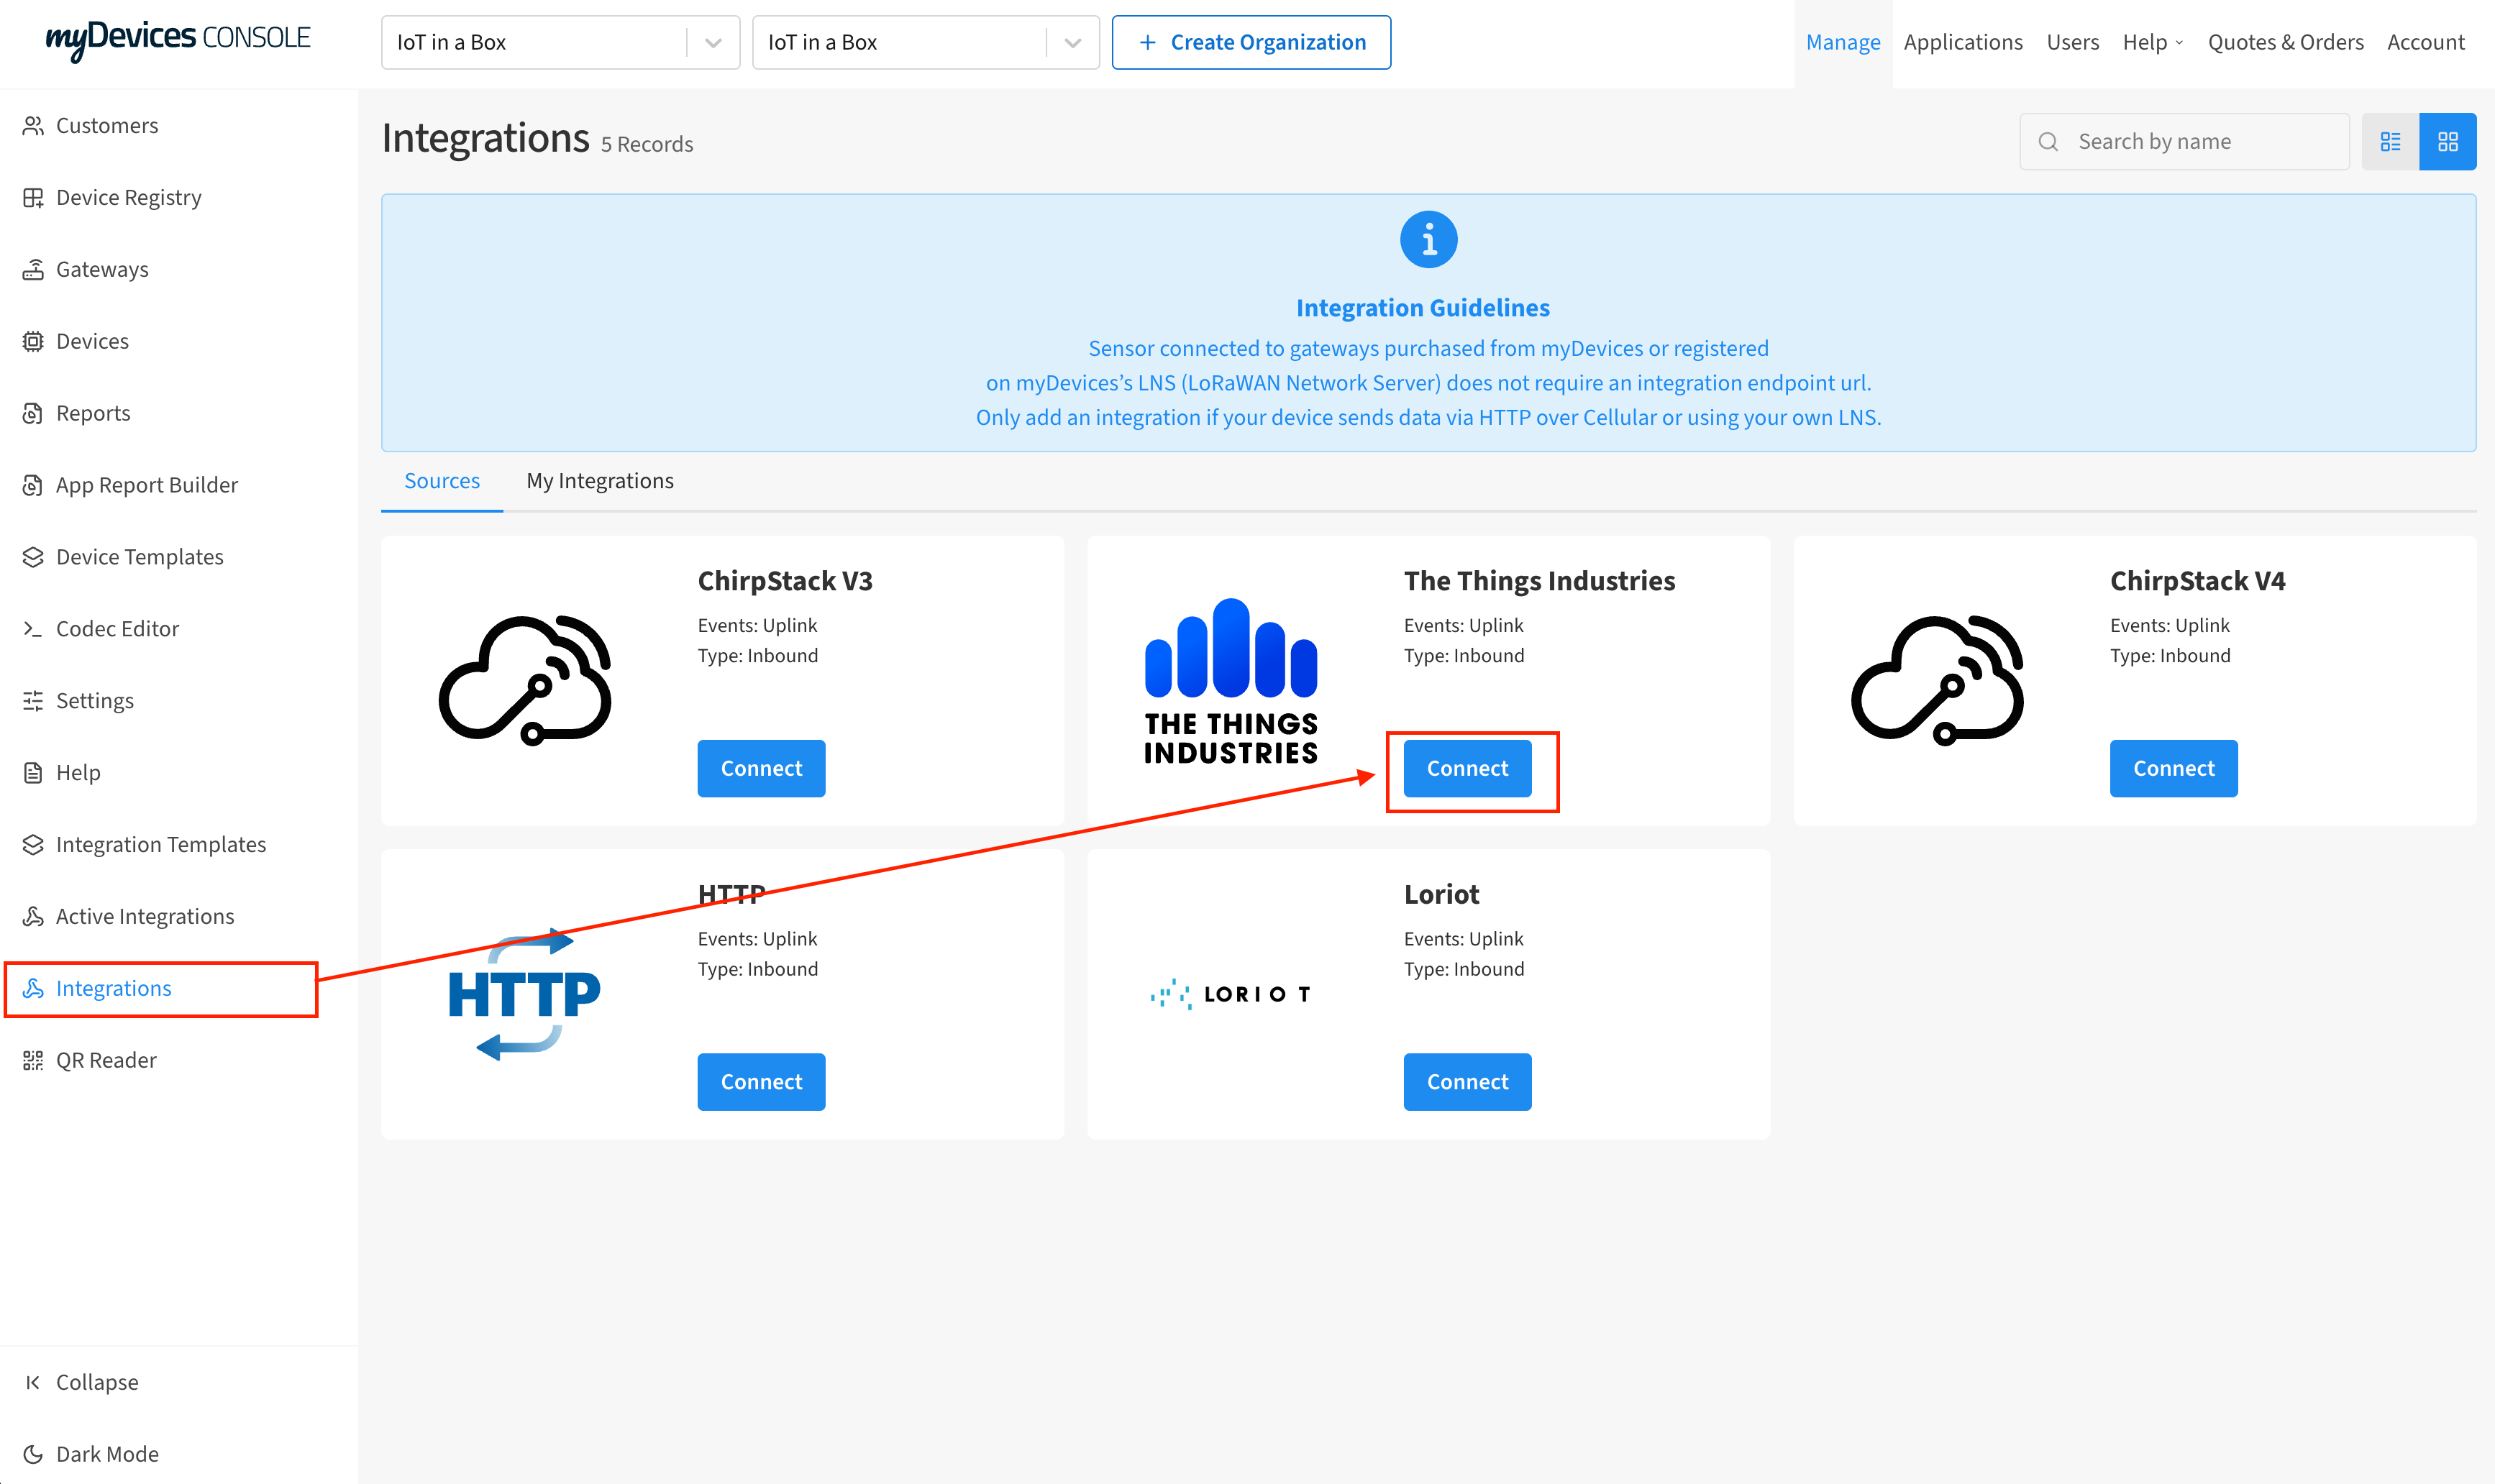
- Log in to the myDevices Console.
- Navigate to the Integrations section.
- Find The Things Industries and click Connect.
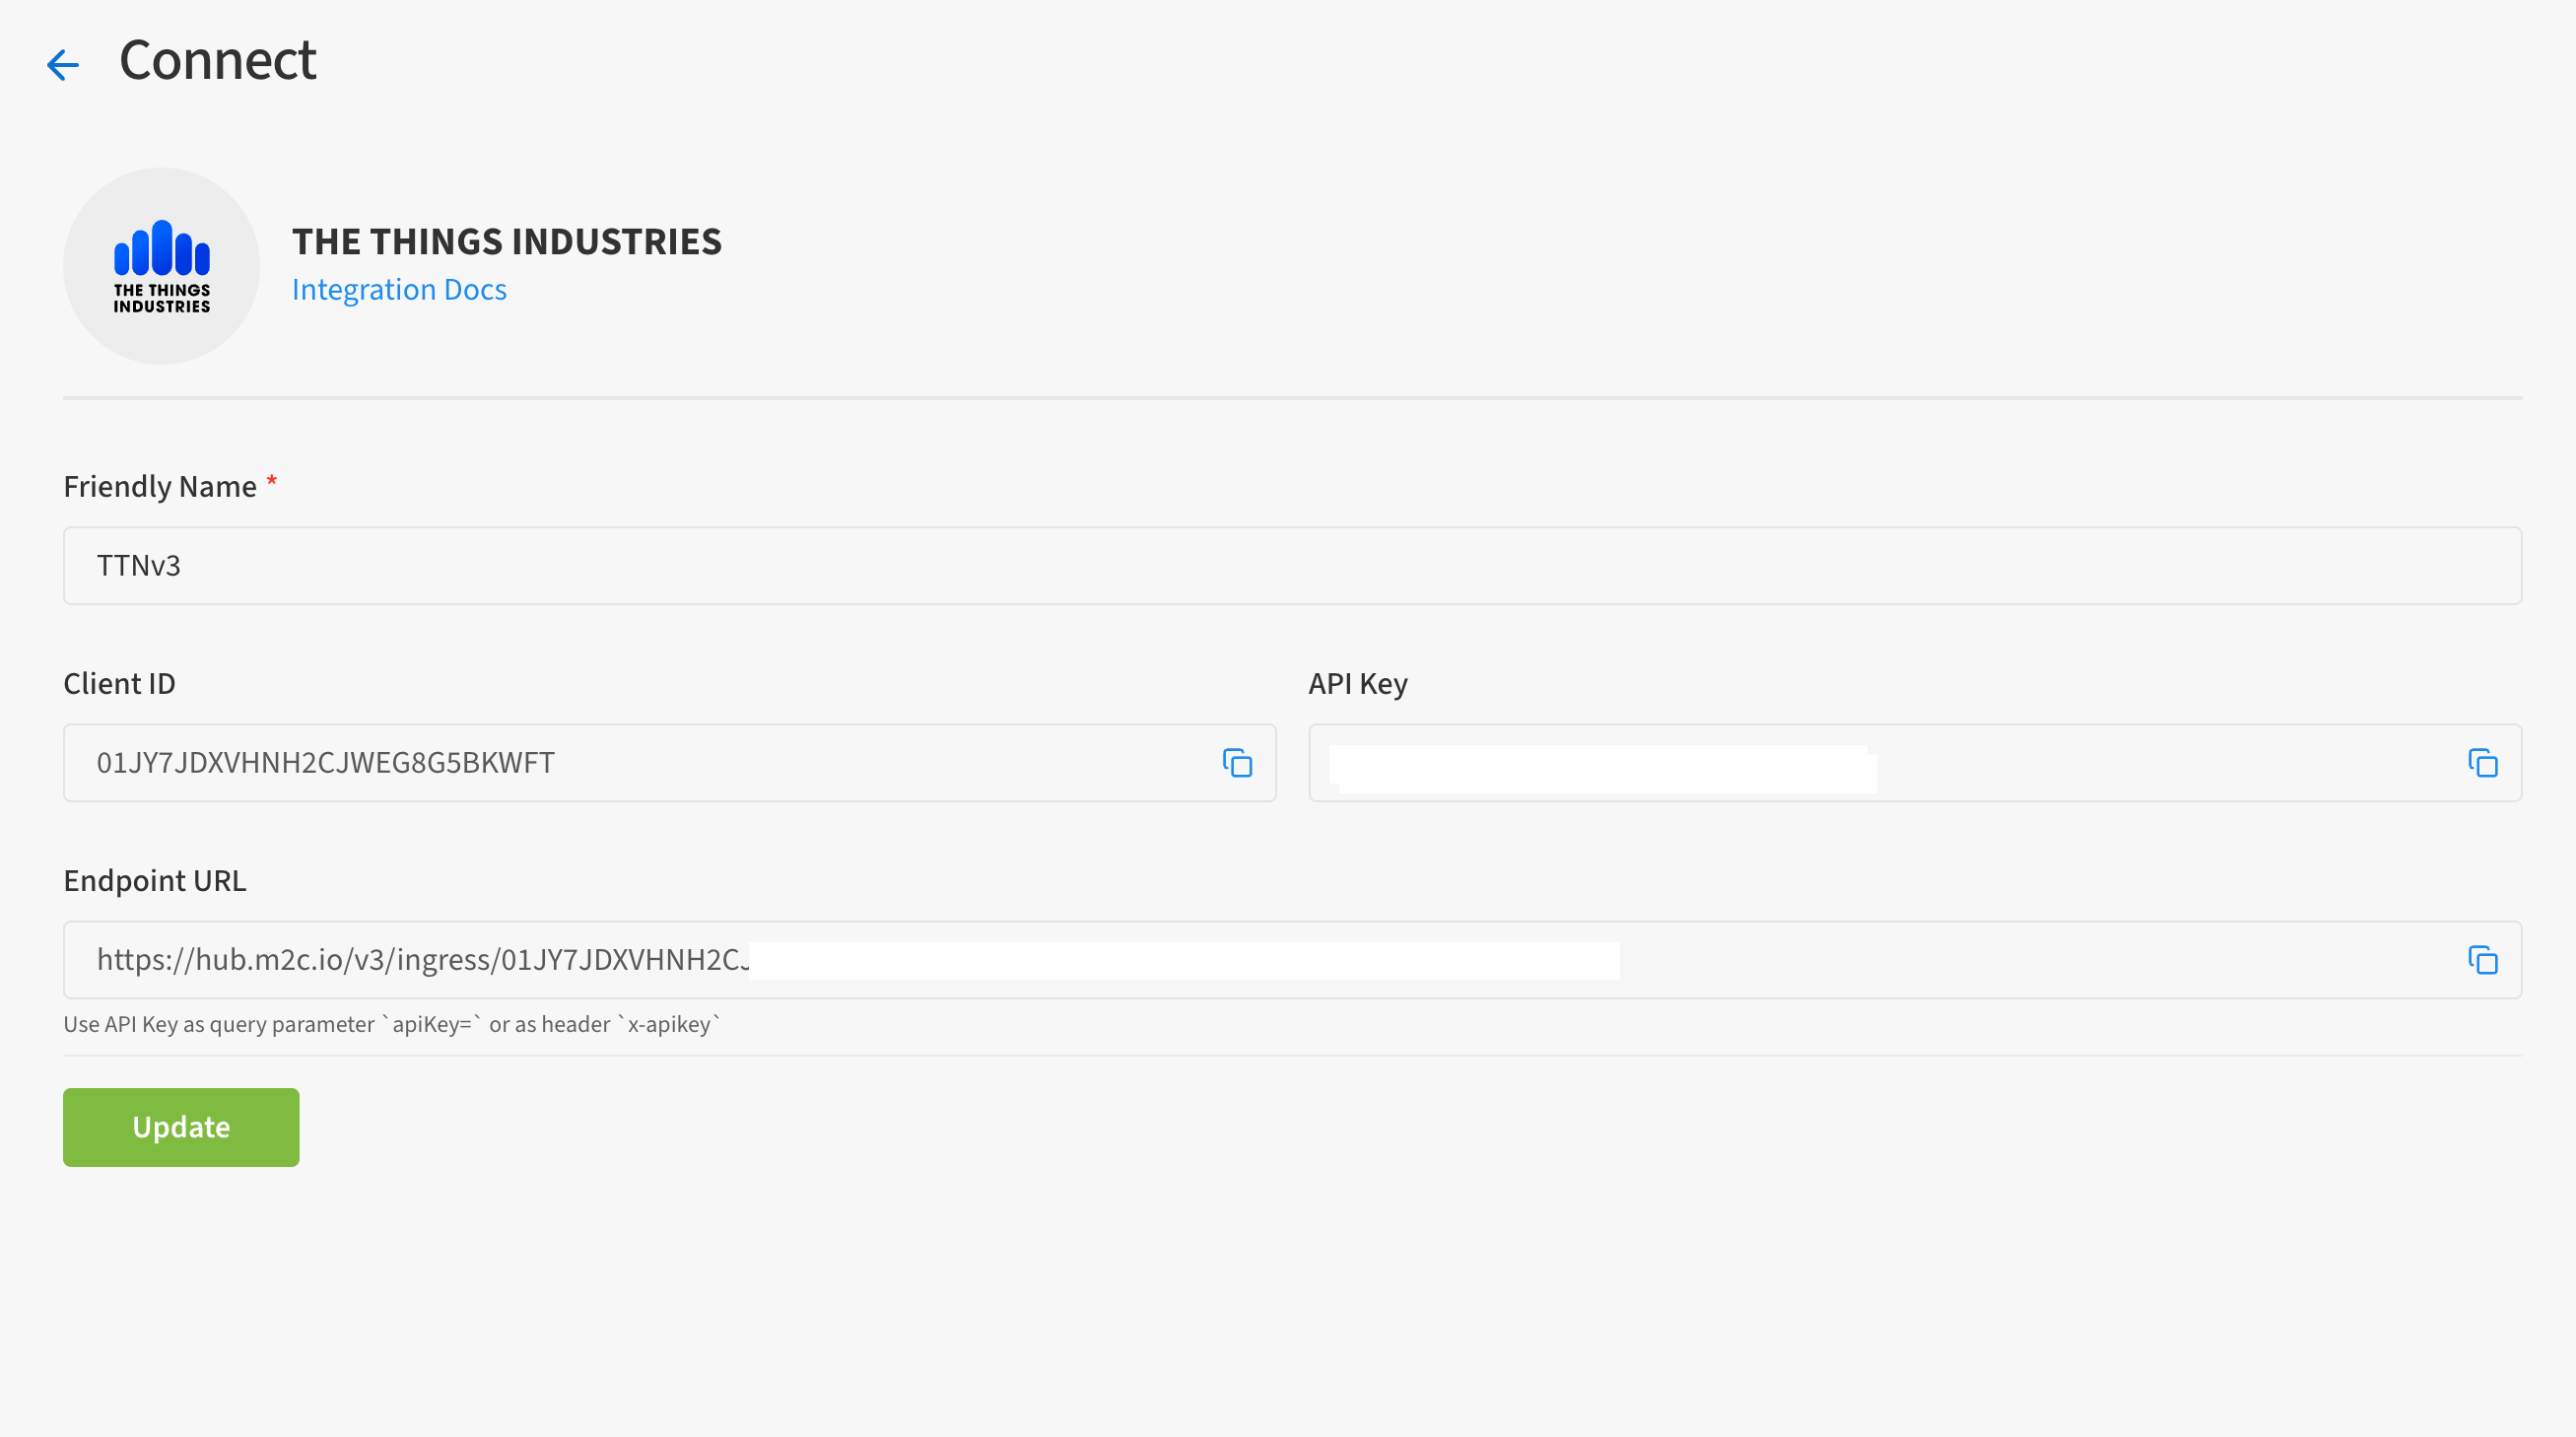
- Enter a name for your integration and click Generate.
- Copy the provided Client ID, API Key, and Webhook URL.
- Go to the Things Industries Console, open your Application, and select Webhooks.
- Choose the myDevices Webhook template.
- Paste the Client ID and API Key from the myDevices portal.
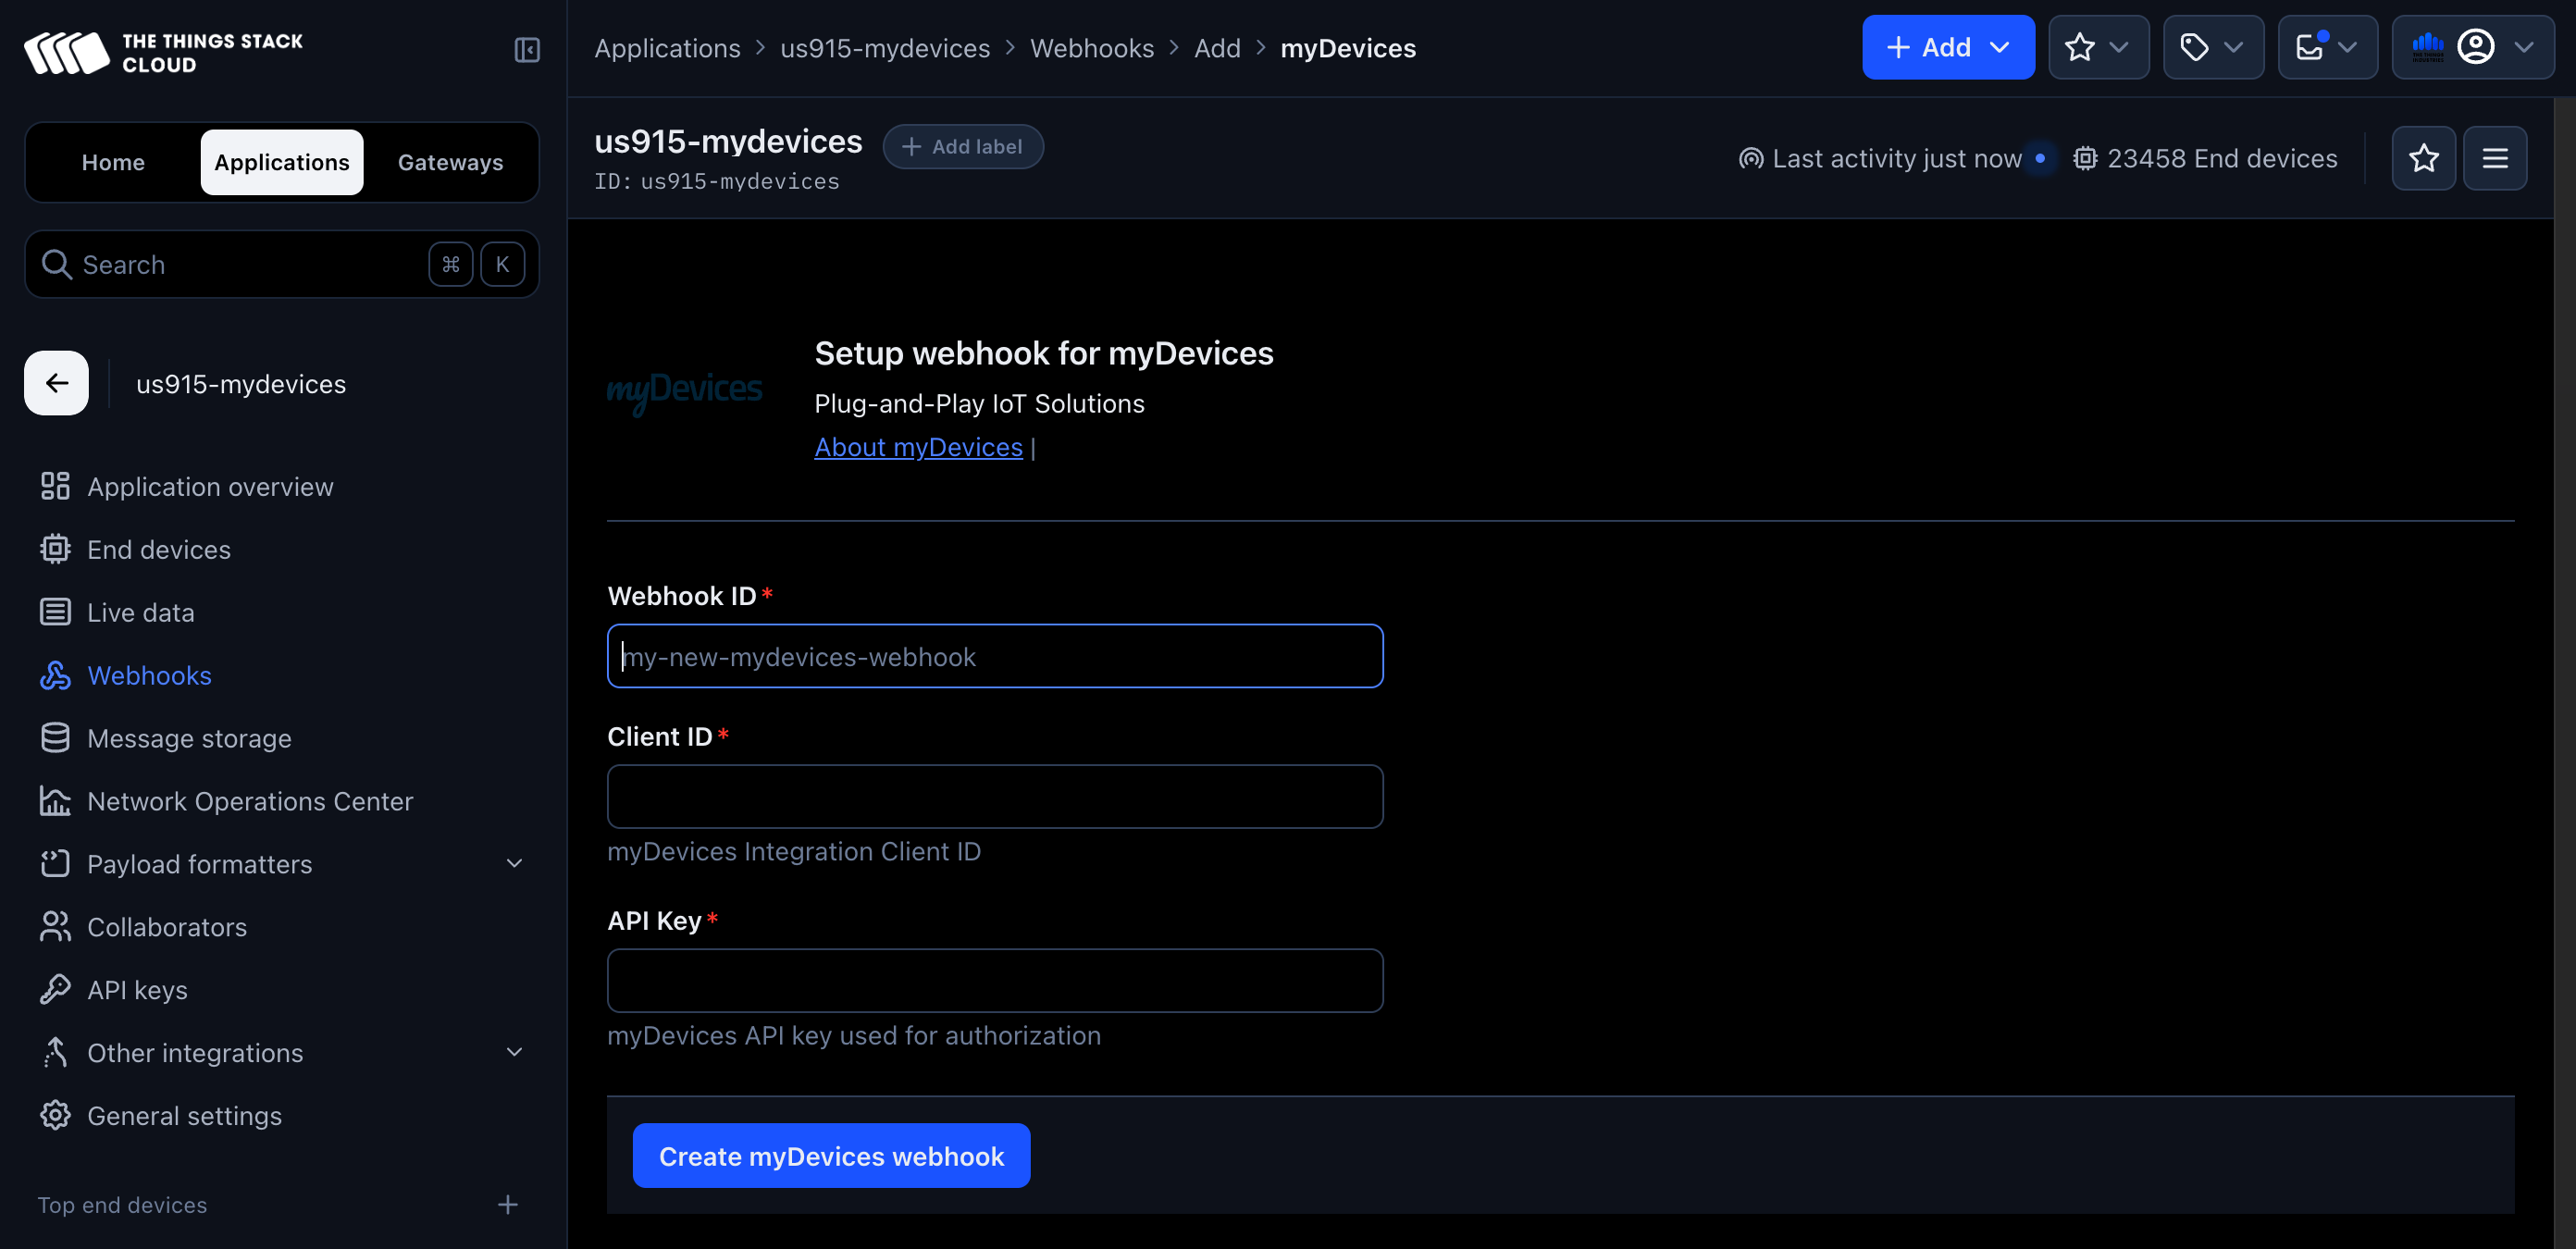
- Click Create myDevices webhook to complete the integration.