Onjenious Network
Objenious Network
About Objenious
Objenious, a Bouygues Telecom subsidiary, has selected LoRaWAN® technology, a global standard, in order to provide the best support to these businesses through every step of their transformation. Objenious also provides a network, an IoT platform called SPOT (stands for Smart Portal of Things) and tailored services to meet businesses needs.
Using Objenious with Cayenne
Cayenne makes it easy to use your LoRa device and the Objenious network. You will need to:
- Create / Log into your account on the Objenious SPOT portal
- Register your device on the SPOT portal
- Setup traffic forwarding to Cayenne
- Add your device to your Cayenne dashboard
We will walk you through these steps in the following sections.
Note: At present the Objenious SPOT portal is currently shown in French only. The documentation shown in this section will reference the SPOT portal in French, but the steps should be easy enough to follow along.
Create account
To get an account with Objenious, you will need to work directly with Objenious. Although there is an account creation link on the SPOT portal, it requires an Activation Code that you must first obtain from Objenious.
Log into the SPOT portal
Once you have your account, you can proceed with the logging into the SPOT portal. After logging in, you will see your Dashboard and from there you can proceed with setting things up to connect with Cayenne.
Manually register device
Before you can use your LoRa device on the Objenious network, it must be registered on the network. The following information will help guide you through this process using Objenious's SPOT portal and the CAPTEURS screen.
Import Devices
To get started with addingew devices, click on the CAPTEURS link in the side menu shown on the SPOT dashboard. From the screen that appears, click on the IMPORTER DES CAPTEURS button.
In order to import devices into Objenious, you will need to download and fill in a template file. Download the template by clicking on the Téléchargez le template button. Fill in the required information for the devices that you wish to import and save the template.
Note: Takeote of which Groupe (code) you specify your devices get imported to. Later when you setup data forwarding to Cayenne, you will need to do so for each group of devices you want to forward data.
Note: If you need more information on this step, or run into trouble importing your devices, you may wish to refer to Objenious' . that contains a wealth of helpful information.
To complete importing your devices, click on CHOISIR UN FICHIER and browse to the template file that contains the devices you wish to importn. Click on the IMPORTER button and then the ACCEPTER button.
Note: You will see the status of your device import and any errors down below in the history section on the Import screen. If you run into any errors, you can expand the details for that import attempt and then try again.
Once your devices have been imported, they should appear on the GESTION DES CAPTEURS screen.
Note: that it can take up to 48 hours forewly imported devices to be activated on Objenious. In the meantime, you will see your device shown in the list of devices, but you will see an activation error shown in the status (STATUT) field. Once your device is ready to be used, you will see a green EN ACTIVITÉ status shownext to your device.
Once your device has been imported and is ready to be used, you can proceed with setting up data forwarding to Cayenne.
Setup device forwarding to Cayenne
In order for Cayenne to be able to able to receive your device’s information, you will need to setup forwarding. When devices are imported into Objenious, they are imported into a group (Groupe). This setup will need to be performed once for each group of devices in your account.
To perform this step, expand the CONFIGURATION option in the side menu and select Scénarios et alertes. On the SCÉNARIOS ALERTES screen that appears, click on the CRÉER UN SCÉNARIO button to begin creating aew scenario.
On the CHOIX DU SCÉNARIO page that appears, scroll down and select the HTTP Push Route (ROUTAGE) option. Then click on the SUIVANT button to continue to theext step.
On the Parameters screen (PARAMÉTRAGE DU SCÉNARIO), make the following choices:
Enter a name for the route in the name (NOM DU SCENARIO) field, such as
Cayenne Forward.From the group (GROUPE) field, select which group of devices you want this rule to apply. In the example shown here, our group isamed MyDevices. Yours will beamed differently.
From the list of device types (TYPE DE CAPTEUR) select All (TOUS).
In the destination URL field (ENVOI D'UNE REQUÊTE HTTP) enter in Cayenne's Objenious uplink URL.
https://lora.mydevices.com/v1/networks/objenious/uplinkUnder CONTENU be sure to select the MESSAGE option. This is required so that Cayenne receives the entire payload data andot just decoded values.
Finally, click on the create scenario (Créer le scénario) button to complete the creation.
You will then see your completed route shown on the SCÉNARIOS ALERTES screen. Your group is now configured to forward data to Cayenne. You can now proceed with adding your devices in Cayenne.
Add device to Cayenne
Once your device has been registered, programmed, configured to forward data to Cayenne and is online, you can proceed with adding the device in Cayenne so that it appears in your dashboard.
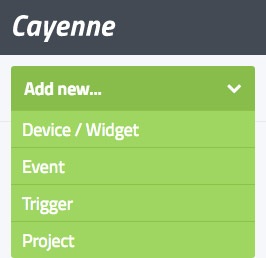
From the Cayenne Dashboard, click Add New > Device / Widget.
From the list of devices & widgets that appears, select the LoRa category and then Objenious option to view a list of supported devices.
After selecting the device that you wish to add, settings for that device will appear. In the following section, we’ll walk you through the settings needed for adding a previously registered device.
Already Registered
If your device has been previously registered on Objenious, it can be quickly & easily added to Cayenne. Once added, your device and all of its sensors will appear in your dashboard.
Items you will need:
- Which LoRa technology device is being added?
- Your device will need to have been previously registered on the network. Refer to Manual device registration if you need help with manually registering your device on the network.
- What is the unique DevEUI for the device being added?
To see how easy it is, let’s walk through an example of connecting an Adeunis Pulse which was previously registered under a Objenious account.
1. Choose the Network
Make sure Objenious is selected in the list of Networks.
2. Select the Device
Select your device from among the list supported Objenious devices. In this case, we’ll select the Adeunis Pulse.
3. Enter Settings & Add device
In order to add the device, Cayenneeeds to know some information about the device and how it will be shown on the dashboard.
- Give the device aame. In our case, we’ll enter "LoRa Pulse" in the Name field.
- Enter the DevEUI for this device into the DevEUI field.
- Our device has been previously manually registered with Objenious. Make sure “Already Registered” is selected in the Activation Mode field.
- Click Add device.
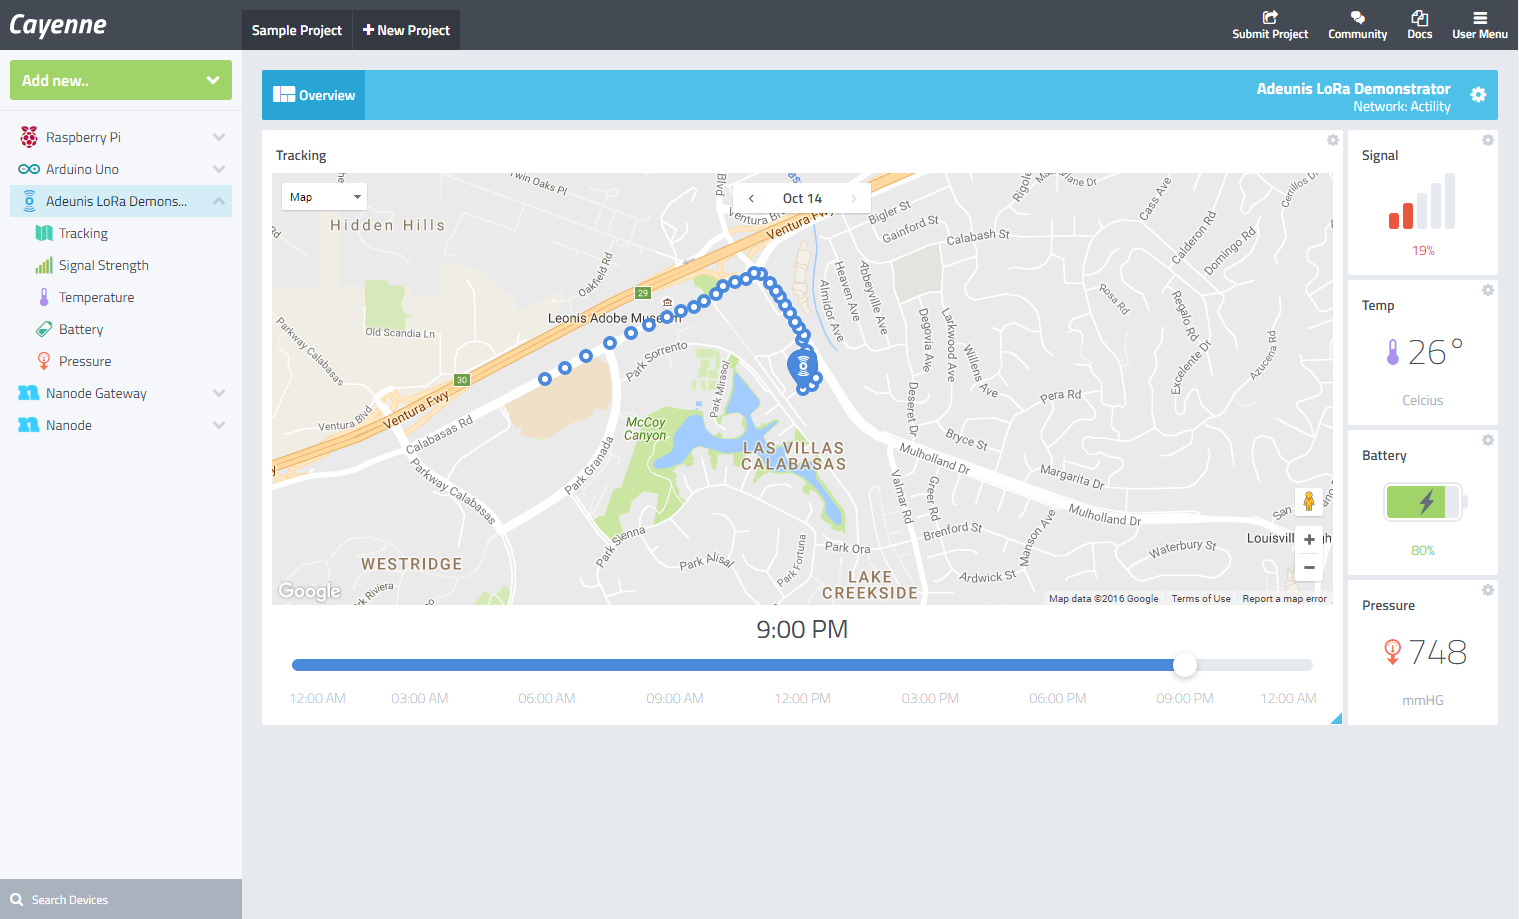
The Pulse has been added to your dashboard and Cayenne will automatically add widgets for the sensors on the device. You can now track the location of your device as well as examine the current status of the water, gas, electricity & heat sensors on the device.